HAPPY BIRTHDAY Brenna!!! You can thank Brenna for this recipe because she asked for Red Velvet Pancakes for her birthday. And quite honestly, when she did I rolled my eyes inside and thought, "blah. Those are a nice idea, but they are never that good... They are usually dry and kind of flat and sometimes rubbery. They taste ok, and the quality is never that great." Even at restaurants, they are always wanting. Like I get the idea! It's a good idea! Red chocolate pancakes, yum! Just not usually the most successful idea. But whatever. It's her birthday, I'll get her whatever she wants ;D Just because this recipe usually turns out a flop, doesn't mean that I won't give it my darndest! So I found two recipes online that looked like they could be promising possibilities and then I concocted this recipe from both of those, crossing my fingers that they will be at least somewhat good. There were recipes that used a red velvet cake mix...
GROSS!
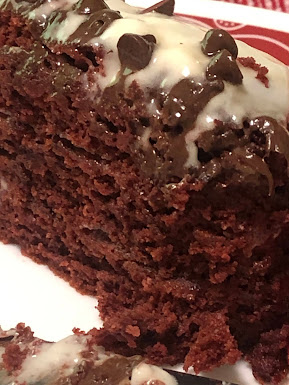
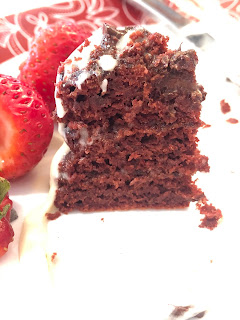
I don't want a disgusting cake mix for breakfast! I wanted a pancake that wasn't flat and rubbery, and dry! I wanted it to be somewhat moist (not doughy), fluffy if possible, and have a crumb to it. (Do you know what it means to have a crumb? It means that when you slice the confection with your fork, you will get a crumb along the side where you slice it. This is also how I like my cheesecakes! ;p)
See that crumb? 😉😍
So I took the ingredients from both recipes that I thought would give me the best chance of producing these results, mixed it up, shut my eyes, and poured it in the pan and LO AND BEHOLD....... TA DAAAAAAAAA!!!!!! These were delicious!!! YAY!!! Finally a red velvet pancake recipe that is actually worth making AND eating!!! :D These are the best Red Velvet Pancakes that I have ever had! Even at restaurants! Yay! I'm so happy! Thanks, Bren for making me make these! :D
Here are the links to both of those recipes, and my recipe is below! ;)
https://www.tastemade.com/videos/red-velvet-mini-pancake-pockets
https://longbournfarm.com/wprm_print/10082
- Recipe:
- 6 oz semisweet chocolate, melted (I used bittersweet/dark chocolate. my measurement was not exact.)
- 1 cup all-purpose flour
- 2 Tbls. sugar
- 1 tsp baking powder
- ½ tsp baking soda
- ¼ tsp salt
- 2 large eggs
- 1 cup buttermilk
- 2 tbsp unsalted butter, melted and cooled to room temperature
- 1 tsp vanilla extract
- 1 small bottle red food coloring
Topping/Syrup
- 125g cream cheese, room temperature
- ¾ cup unsalted butter, room temperature
- ½ tsp vanilla extract
- 1 ¼ cups confectioner’s sugar (I tried to replace some of the powdered sugar with maple syrup to replace some sugar, but also to thin it out.)
- 2 Tbls. Milk/ Cream/ Creamer
- Mini Chocolate Chips for topping
- Method:
- Whisk together the flour, sugar baking powder and salt.
- In a small bowl, whisk the eggs, milk, butter, vanilla extract and melted chocolate. (Make sure ingredients are not too cold or it will harden the chocolate when you combine them. However, my ingredients were a little cold and this did happen to me. I had to end up putting it in the microwave!) Add the red food coloring and mix well.
- Cobine this to the flour mixture and mix only as much as you need to to incorporate the ingredients. Let sit at least 5-10 minutes. Note: This batter is a thicker batter.
- Spray pan with cooking spray (I used coconut oil) and cook on medium heat. Because these are thick, they take a little bit more time to cook. Use medium-low to medium heat.
Filling
- Beat the cream cheese and butter with an electric mixer until fluffy.
- Add the confectioner’s sugar and the vanilla extract and mix until combined. Thin with maple syrup or Creamer is my preference.


